Setting up APRS on the Raspberri Pi
Creating a APRS gateway with a Raspberry Pi is not easy. It requires several complex steps, and mistakes can be made. In this guide, I'll show you how to run Hamlib, Direwolf and XASTIR on a Raspberry Pi on the easiest possible way.
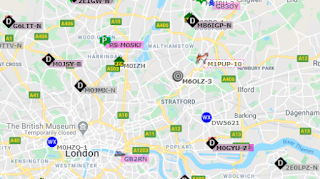 |
| A small sample of APRS signals around London, from aprs.fi |
APRS is big fun. Creating an igate/digipeater is not. Specially not on a Raspberry Pi. This step by step guide shows how to make Hamlib, Direwolf and XASTIR work together to send and receive APRS packets from your Pi. Even if you have no previous knowledge about Raspbian, copying and pasting the commands below will lead you to a successful installation and configuration.
There's plenty of in-depth tutorials on how to do this. Probably the best one, in my personal opinion, is the video that Julian OH8STN has on YouTube. If you get confused by these commands, go and take a look at his video.
Open a terminal in your Raspberry Pi and type these commands:
sudo apt-get -y install gpsd gpsd-clients python-gps chrony
sudo nano /etc/default/gpsd
Make to following settings on the file:
START_DAEMON="true"Ctrl-X and yes to save the changes.
USBAUTO="false"
DEVICES="/dev/ttyACM0"
GPSD_OPTIONS="-n"
Note: Pay attention to the USBAUTO line above. Most tutorials will instruct you to set it to "true". If you do so, the USB connection to your 7100 will always be "busy", and won't work. The gpsd is a getty process, and tries to grab every USB device you plug in. I can only assume a similar behaviour on every ICOM rig.
2. Install Hamlib
Go for a drink after pressing Enter on "make". On a Pi 3b+, this step takes about 40 minutes. Once it's done, continue with the following commands:

That will give you the hamlib model for your radio. In the 7100, it is 3070. Test hamlib by getting the frequency that your radio is now on.

Then, edit the next file:
sudo nano /etc/chrony/chrony.confAnd add the following line to the end of the file:
refclock SHM 0 offset 0.5 delay 0.2 refid NMEACtrl-X and yes to save, again. Run the following commands to restart the gpsd and the chronyd services.
sudo service gpsd restartTry the installation with gpsmon. You'll see something like this:
sudo service chronyd restart
 |
| Output of gpsmon when you have a lock |
2. Install Hamlib
This step is easy, but it takes a while.
sudo apt install git libtool autoconf automake make gcc texinfo
git clone https://github.com/Hamlib/Hamlib.git
cd Hamlib
./bootstrap
./configure
make
Go for a drink after pressing Enter on "make". On a Pi 3b+, this step takes about 40 minutes. Once it's done, continue with the following commands:
sudo make installNext, let's identify what model hamlib uses for your radio. I have a 7100, so I'll search for that number in the output of rigctl -l (lowercase L). If you have, say an Elecraft, search for KX2 or something similar.
sudo ldconfig
reboot
rigctl -l | grep 7100
rigctl -m 3070 -r /dev/ttyUSB0 -s 4800 f
The exact command depends on your radio. for the 7100, I need to force 4800 bauds for some reason. Anyway, your command will return something like:
7078000
VFOA
Now, try to the frequency to the European APRS one:
rigctl -m 3070 -r /dev/ttyUSB0 -s 4800 F 14480000
If your radio changed the frequency to 144.800, you are good to go.
3. Install Direwolf
You may never end up using Direwolf, but don't skip this step. All the other sources that I've found contain inaccurate information on how to build version 1.6 (branch dev). Just these steps:
sudo apt-get install libasound2-dev libudev-dev cmake
git clone https://www.github.com/wb2osz/direwolf
cd direwolf
git checkout dev
mkdir build && cd build
cmake ..
make -j4
sudo make install
make install-conf
Editing the configuration file for direwolf is confusing, to say the least. Here's my own for your reference. Still, most definitely you will only need to do the changes below. Open the file with
cd ~
nano direwolf.conf
Uncomment (remove the initial #) on this line
ADEVICE plughw:1,0
Change this line to read you callsign instead of NOCALL. For instance:
MYCALL M0PQA
Find a line that reads the following:
#PTT COM1 RTS -DTR
And, after that block of lines, add a new line that reads:
PTT RIG 3070 /dev/ttyUSB0
where 3070 is the model number used by Hamlib for your radio.
Note August 2023: This configuration is dependent on your radio. Please read the Direwolf instruction manual. It has a ton of valuable information in there
Finally, edit these two lines:
IGSERVER euro.aprs2.net
IGLOGIN M0PQA 12163
The last 5 digits next to my callsign are the access code to the APRS system. The algorithm to generate them is not a secret. Use this website to generate yours.
Save the file and reboot the Pi. Then run direwolf with:
direwolf
and you should get something like this:
4. Check your ICOM
ICOM radios are famous for creating problems with adjacent systems if the baudrate is not properly configured in the radio. Press "SET" and go Connectors > CI-V > CI-V Baud Rate, and set it to 19200. If you leave it on "Auto", the rest of this tutorial won't work. 100% guaranteed.
5. Install XASTIR
Zero complexity. Just run this:
sudo apt -y install xastir
That's all. Now, run it with:
sudo xastirNow, you probably see a lot of errors about "get_rotated_label_text_height_pixels: Couldn't get font -adobe-helvetica-medium-r-normal--14-*-*-*-*-*-iso8859-1". You can safely ignore them, but they are a hassle. To stop seeing them, go to File > Configure > Fonts, and type "fixed" (or any other font available in your system) in all boxes. Like this:
 |
| The Fonts settings on XASTIR |
You'll need to create two interfaces in Xastir now:
GPS Module
GPSD Host: localhost
GPSD Port: 2947
Check: "Activate on Startup?" and "Reconnect on Failure?"
Leave "Set System Clock from GPS Data" unchecked (you have already done this before)
 |
| GPS interface settings in XASTIR |
Direwolf
Type: Network AGWPE
Host: localhost
Port: 8000
IGate Options: "Allow RF -> Inet and Inet -> RF traffic"
 |
| Hamlib settings in XASTIR |
Once the two interfaces are created and listed in the screen below, press "Start All". Their status will change to UP
 |
| Both interfaces up |
Finally, edit the configuration of your station. Go to File > Configure > Station, and provide your callsign, your APRS symbol and your location. For your convenience, you can use this website to make the conversions between the Google Maps format and the one that XASTIR requires.
6. Send yout first APRS message
In XASTIR, go to Interface > Transmit Now! If your radio keys up, everything is working fine, and you'll start seeing messages coming in. Also, you'll see your location on the map.
As usual, if something doesn't work, let me know. I did my best to collect all the information and depict it as accurately as possible. However, I encountered many problems, and I might have seen the same error you are seeing now!
73
check it before buying Raspberry Pi
ReplyDelete